# Kandinsky
## Overview
Kandinsky inherits best practices from [DALL-E 2](https://huggingface.co/papers/2204.06125) and [Latent Diffusion](https://huggingface.co/docs/diffusers/api/pipelines/latent_diffusion), while introducing some new ideas.
It uses [CLIP](https://huggingface.co/docs/transformers/model_doc/clip) for encoding images and text, and a diffusion image prior (mapping) between latent spaces of CLIP modalities. This approach enhances the visual performance of the model and unveils new horizons in blending images and text-guided image manipulation.
The Kandinsky model is created by [Arseniy Shakhmatov](https://github.com/cene555), [Anton Razzhigaev](https://github.com/razzant), [Aleksandr Nikolich](https://github.com/AlexWortega), [Igor Pavlov](https://github.com/boomb0om), [Andrey Kuznetsov](https://github.com/kuznetsoffandrey) and [Denis Dimitrov](https://github.com/denndimitrov). The original codebase can be found [here](https://github.com/ai-forever/Kandinsky-2)
## Usage example
In the following, we will walk you through some examples of how to use the Kandinsky pipelines to create some visually aesthetic artwork.
### Text-to-Image Generation
For text-to-image generation, we need to use both [`KandinskyPriorPipeline`] and [`KandinskyPipeline`].
The first step is to encode text prompts with CLIP and then diffuse the CLIP text embeddings to CLIP image embeddings,
as first proposed in [DALL-E 2](https://cdn.openai.com/papers/dall-e-2.pdf).
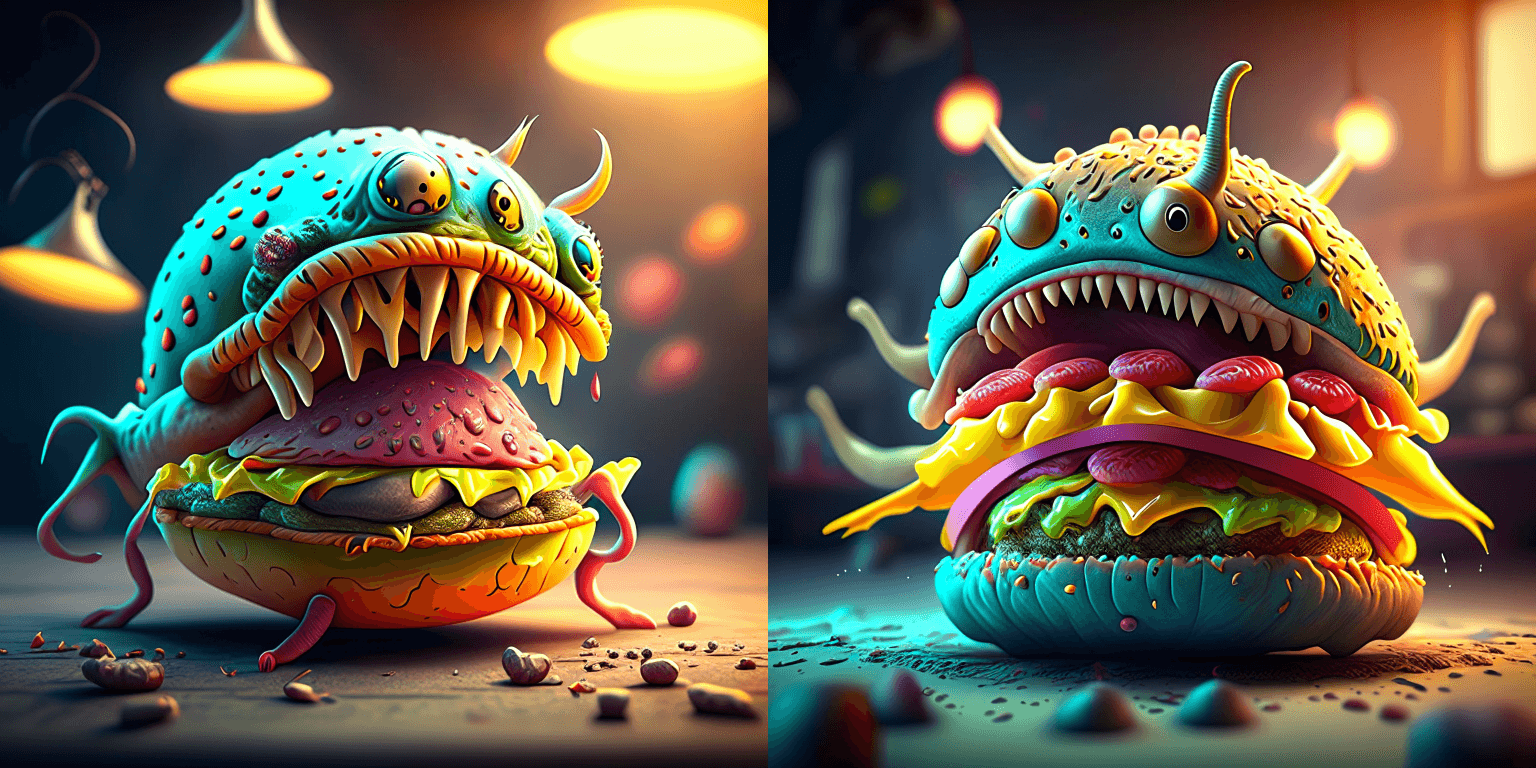
Let's throw a fun prompt at Kandinsky to see what it comes up with.
```py
prompt = "A alien cheeseburger creature eating itself, claymation, cinematic, moody lighting"
```
First, let's instantiate the prior pipeline and the text-to-image pipeline. Both
pipelines are diffusion models.
```py
from diffusers import DiffusionPipeline
import torch
pipe_prior = DiffusionPipeline.from_pretrained("kandinsky-community/kandinsky-2-1-prior", torch_dtype=torch.float16)
pipe_prior.to("cuda")
t2i_pipe = DiffusionPipeline.from_pretrained("kandinsky-community/kandinsky-2-1", torch_dtype=torch.float16)
t2i_pipe.to("cuda")
```
By default, the text-to-image pipeline use [`DDIMScheduler`], you can change the scheduler to [`DDPMScheduler`]
```py
scheduler = DDPMScheduler.from_pretrained("kandinsky-community/kandinsky-2-1", subfolder="ddpm_scheduler")
t2i_pipe = DiffusionPipeline.from_pretrained(
"kandinsky-community/kandinsky-2-1", scheduler=scheduler, torch_dtype=torch.float16
)
t2i_pipe.to("cuda")
```
Now we pass the prompt through the prior to generate image embeddings. The prior
returns both the image embeddings corresponding to the prompt and negative/unconditional image
embeddings corresponding to an empty string.
```py
image_embeds, negative_image_embeds = pipe_prior(prompt, guidance_scale=1.0).to_tuple()
```
The text-to-image pipeline expects both `image_embeds`, `negative_image_embeds` and the original
`prompt` as the text-to-image pipeline uses another text encoder to better guide the second diffusion
process of `t2i_pipe`.
By default, the prior returns unconditioned negative image embeddings corresponding to the negative prompt of `""`.
For better results, you can also pass a `negative_prompt` to the prior. This will increase the effective batch size
of the prior by a factor of 2.
```py
prompt = "A alien cheeseburger creature eating itself, claymation, cinematic, moody lighting"
negative_prompt = "low quality, bad quality"
image_embeds, negative_image_embeds = pipe_prior(prompt, negative_prompt, guidance_scale=1.0).to_tuple()
```
Next, we can pass the embeddings as well as the prompt to the text-to-image pipeline. Remember that
in case you are using a customized negative prompt, that you should pass this one also to the text-to-image pipelines
with `negative_prompt=negative_prompt`:
```py
image = t2i_pipe(
prompt, image_embeds=image_embeds, negative_image_embeds=negative_image_embeds, height=768, width=768
).images[0]
image.save("cheeseburger_monster.png")
```
One cheeseburger monster coming up! Enjoy!
We also provide an end-to-end Kandinsky pipeline [`KandinskyCombinedPipeline`], which combines both the prior pipeline and text-to-image pipeline, and lets you perform inference in a single step. You can create the combined pipeline with the [`~AutoPipelineForText2Image.from_pretrained`] method
```python
from diffusers import AutoPipelineForText2Image
import torch
pipe = AutoPipelineForText2Image.from_pretrained(
"kandinsky-community/kandinsky-2-1", torch_dtype=torch.float16
)
pipe.enable_model_cpu_offload()
```
Under the hood, it will automatically load both [`KandinskyPriorPipeline`] and [`KandinskyPipeline`]. To generate images, you no longer need to call both pipelines and pass the outputs from one to another. You only need to call the combined pipeline once. You can set different `guidance_scale` and `num_inference_steps` for the prior pipeline with the `prior_guidance_scale` and `prior_num_inference_steps` arguments.
```python
prompt = "A alien cheeseburger creature eating itself, claymation, cinematic, moody lighting"
negative_prompt = "low quality, bad quality"
image = pipe(prompt=prompt, negative_prompt=negative_prompt, prior_guidance_scale =1.0, guidance_scacle = 4.0, height=768, width=768).images[0]
```
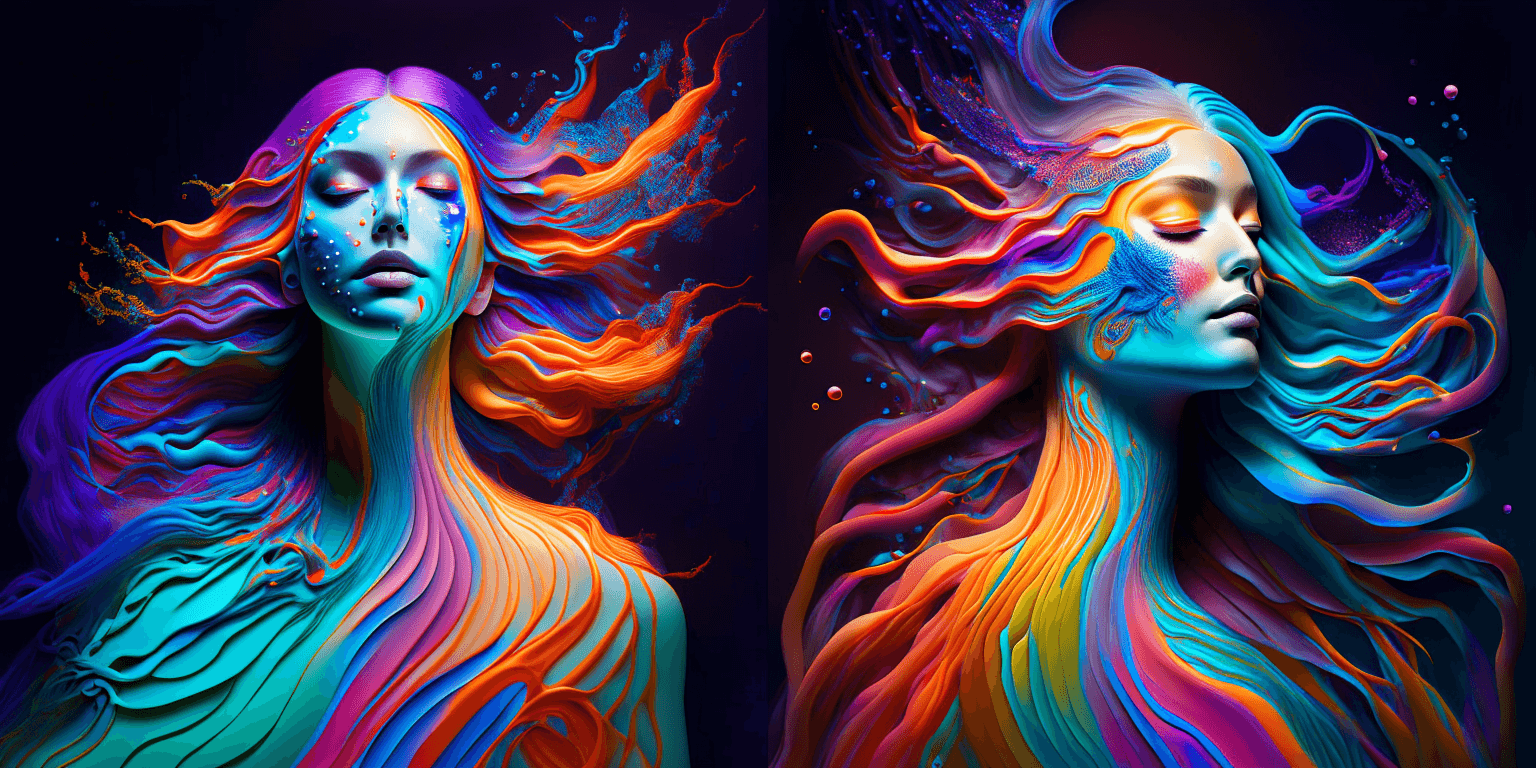
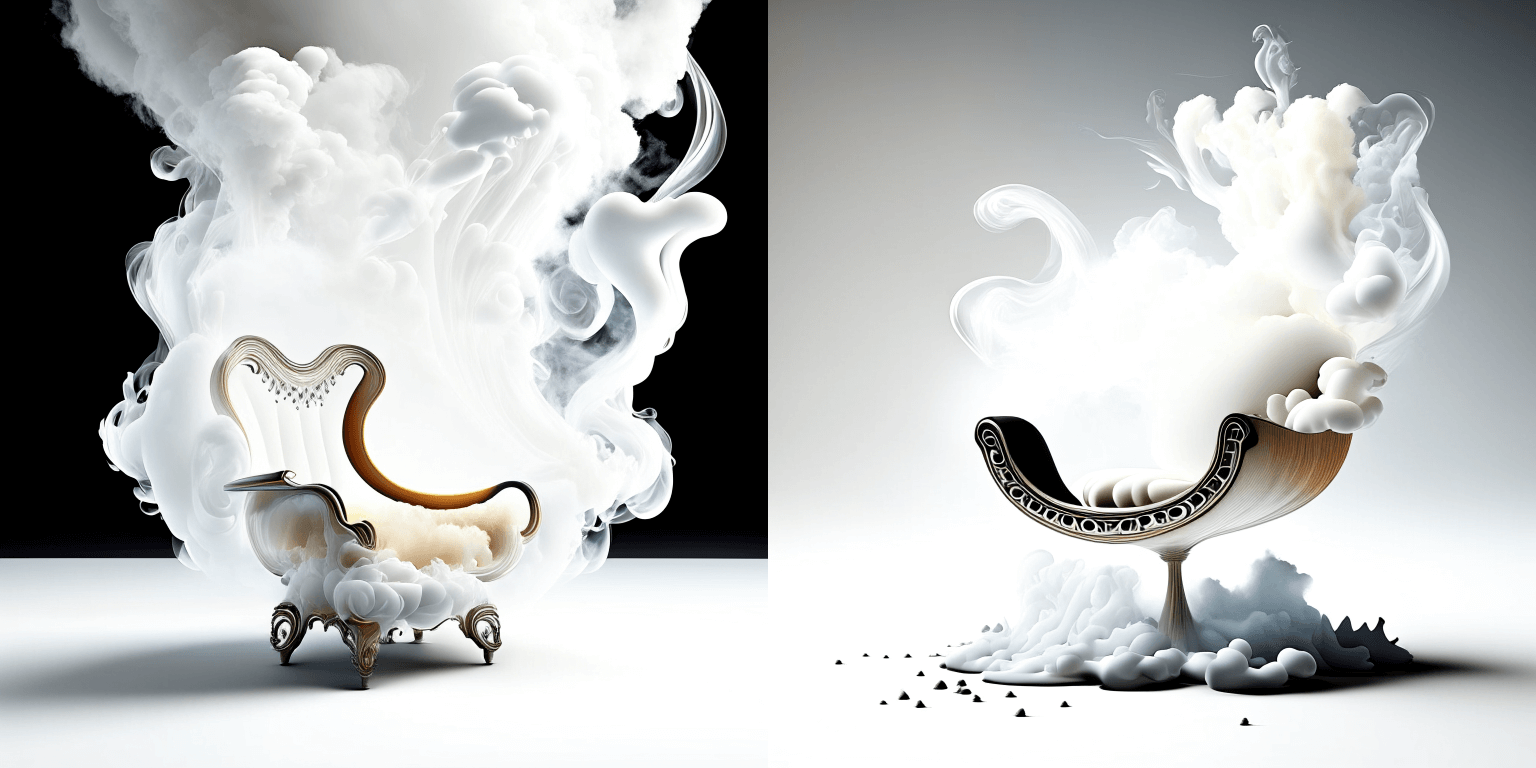
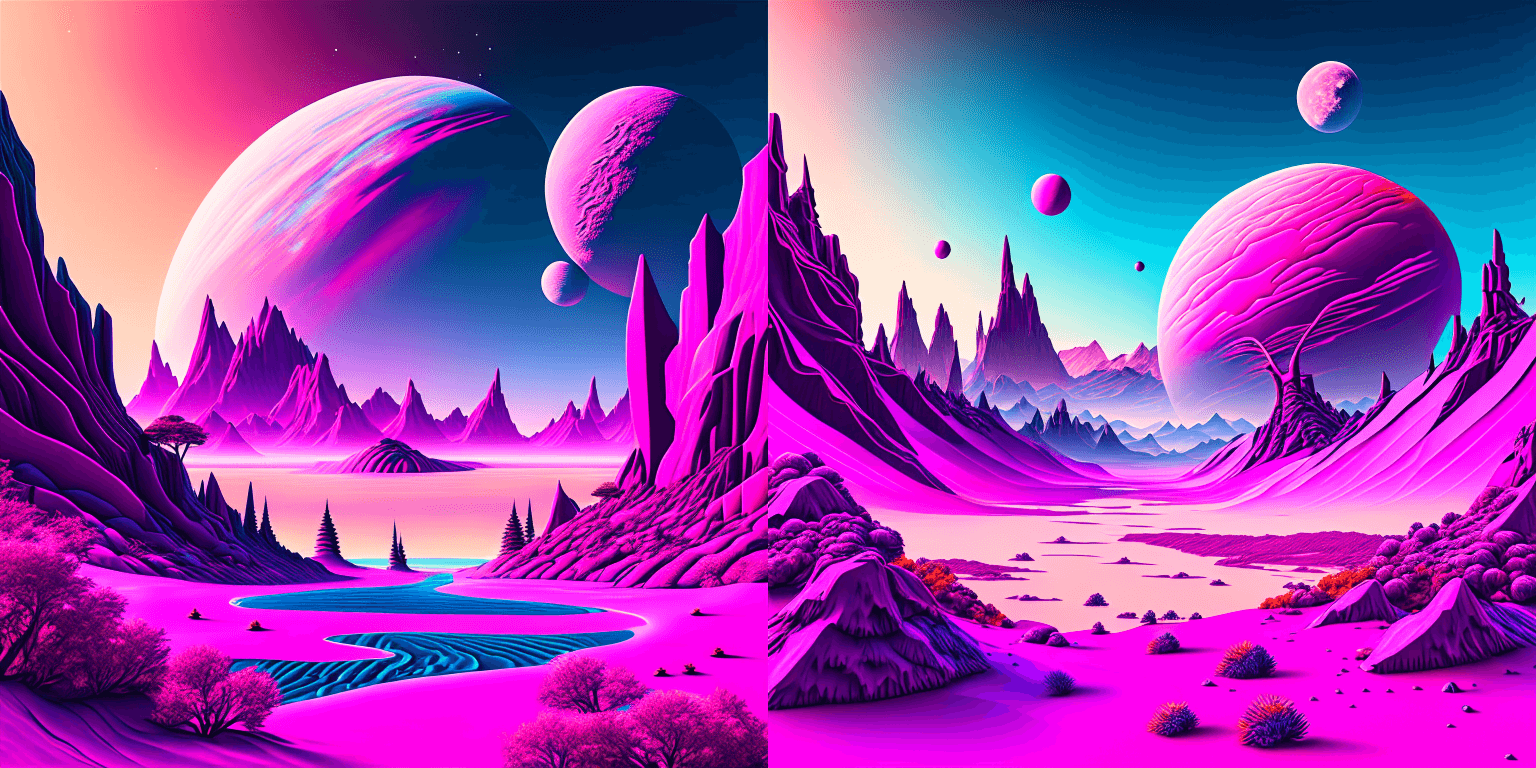
The Kandinsky model works extremely well with creative prompts. Here is some of the amazing art that can be created using the exact same process but with different prompts.
```python
prompt = "bird eye view shot of a full body woman with cyan light orange magenta makeup, digital art, long braided hair her face separated by makeup in the style of yin Yang surrealism, symmetrical face, real image, contrasting tone, pastel gradient background"
```
```python
prompt = "A car exploding into colorful dust"
```

```python
prompt = "editorial photography of an organic, almost liquid smoke style armchair"
```
```python
prompt = "birds eye view of a quilted paper style alien planet landscape, vibrant colours, Cinematic lighting"
```
### Text Guided Image-to-Image Generation
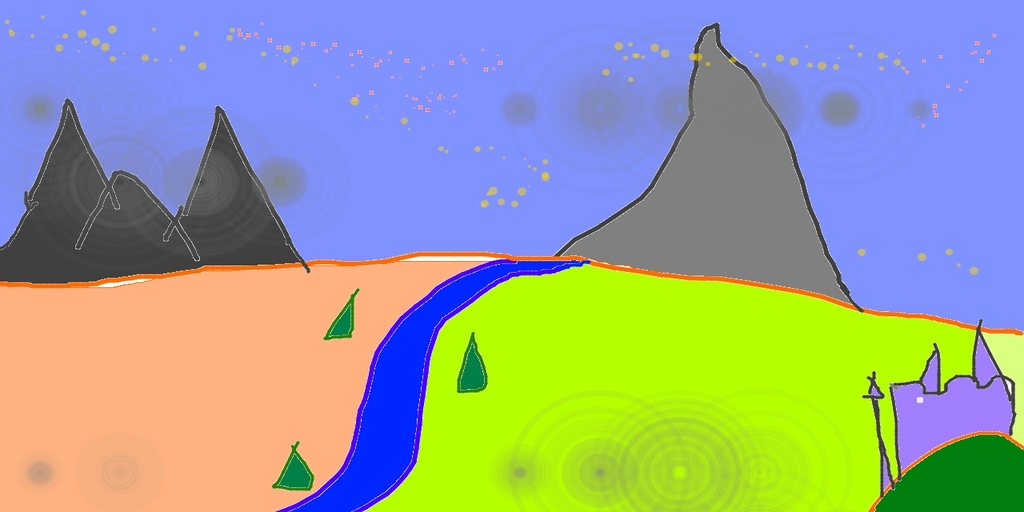
The same Kandinsky model weights can be used for text-guided image-to-image translation. In this case, just make sure to load the weights using the [`KandinskyImg2ImgPipeline`] pipeline.
**Note**: You can also directly move the weights of the text-to-image pipelines to the image-to-image pipelines
without loading them twice by making use of the [`~DiffusionPipeline.components`] function as explained [here](#converting-between-different-pipelines).
Let's download an image.
```python
from PIL import Image
import requests
from io import BytesIO
# download image
url = "https://raw.githubusercontent.com/CompVis/stable-diffusion/main/assets/stable-samples/img2img/sketch-mountains-input.jpg"
response = requests.get(url)
original_image = Image.open(BytesIO(response.content)).convert("RGB")
original_image = original_image.resize((768, 512))
```
```python
import torch
from diffusers import KandinskyImg2ImgPipeline, KandinskyPriorPipeline
# create prior
pipe_prior = KandinskyPriorPipeline.from_pretrained(
"kandinsky-community/kandinsky-2-1-prior", torch_dtype=torch.float16
)
pipe_prior.to("cuda")
# create img2img pipeline
pipe = KandinskyImg2ImgPipeline.from_pretrained("kandinsky-community/kandinsky-2-1", torch_dtype=torch.float16)
pipe.to("cuda")
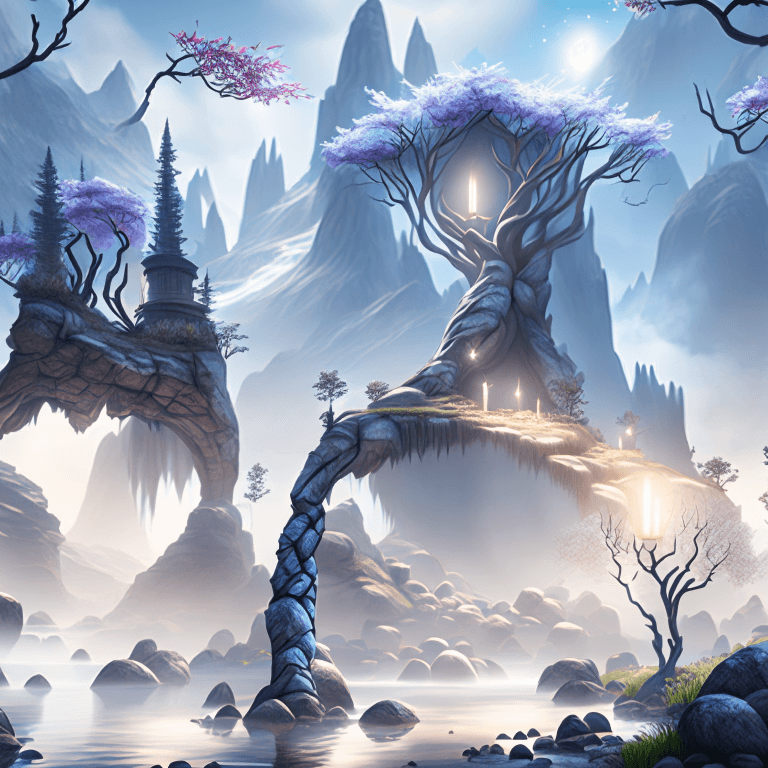
prompt = "A fantasy landscape, Cinematic lighting"
negative_prompt = "low quality, bad quality"
image_embeds, negative_image_embeds = pipe_prior(prompt, negative_prompt).to_tuple()
out = pipe(
prompt,
image=original_image,
image_embeds=image_embeds,
negative_image_embeds=negative_image_embeds,
height=768,
width=768,
strength=0.3,
)
out.images[0].save("fantasy_land.png")
```
You can also use the [`KandinskyImg2ImgCombinedPipeline`] for end-to-end image-to-image generation with Kandinsky 2.1
```python
from diffusers import AutoPipelineForImage2Image
import torch
import requests
from io import BytesIO
from PIL import Image
import os
pipe = AutoPipelineForImage2Image.from_pretrained("kandinsky-community/kandinsky-2-1", torch_dtype=torch.float16)
pipe.enable_model_cpu_offload()
prompt = "A fantasy landscape, Cinematic lighting"
negative_prompt = "low quality, bad quality"
url = "https://raw.githubusercontent.com/CompVis/stable-diffusion/main/assets/stable-samples/img2img/sketch-mountains-input.jpg"
response = requests.get(url)
original_image = Image.open(BytesIO(response.content)).convert("RGB")
original_image.thumbnail((768, 768))
image = pipe(prompt=prompt, image=original_image, strength=0.3).images[0]
```
### Text Guided Inpainting Generation
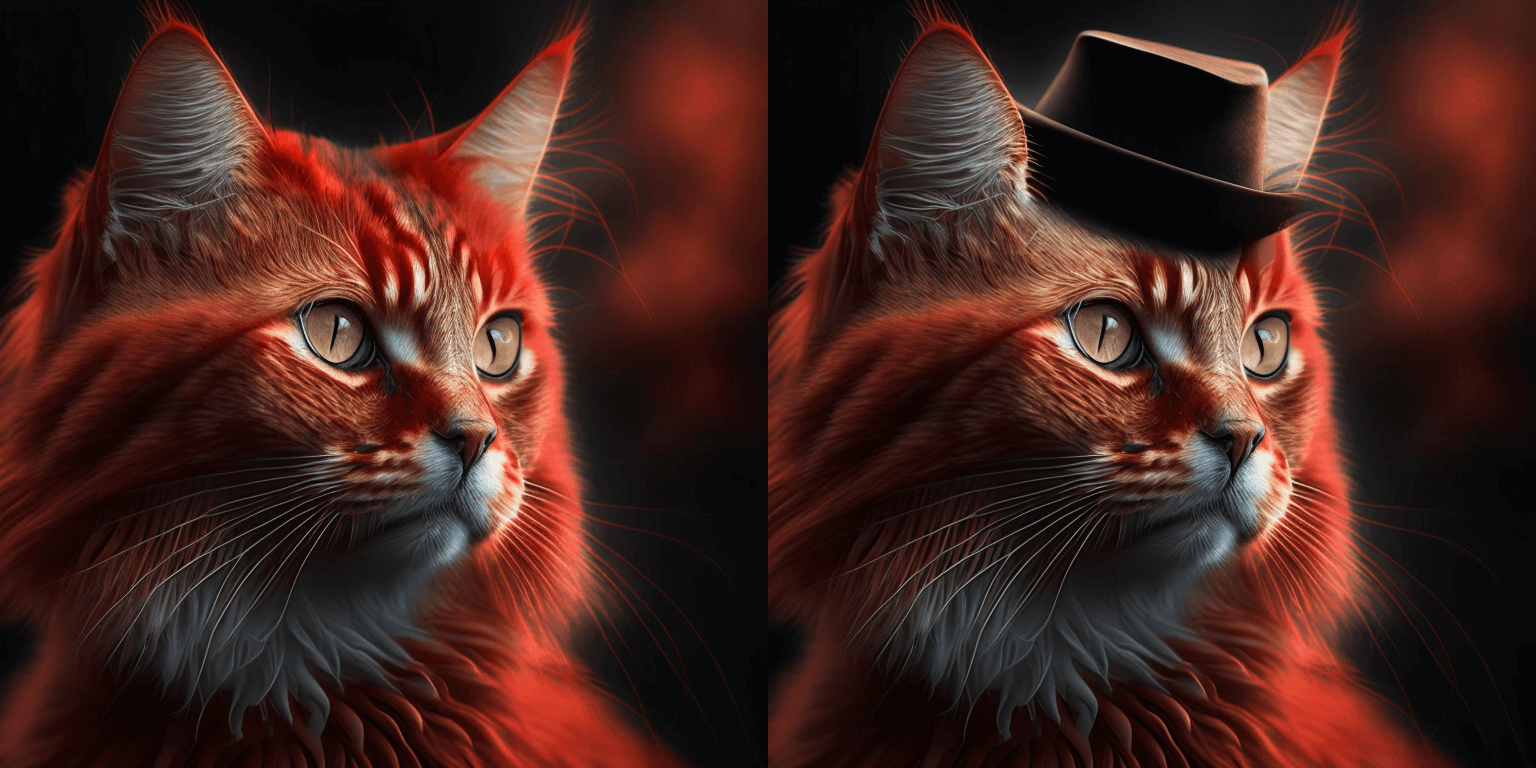
You can use [`KandinskyInpaintPipeline`] to edit images. In this example, we will add a hat to the portrait of a cat.
```py
from diffusers import KandinskyInpaintPipeline, KandinskyPriorPipeline
from diffusers.utils import load_image
import torch
import numpy as np
pipe_prior = KandinskyPriorPipeline.from_pretrained(
"kandinsky-community/kandinsky-2-1-prior", torch_dtype=torch.float16
)
pipe_prior.to("cuda")
prompt = "a hat"
prior_output = pipe_prior(prompt)
pipe = KandinskyInpaintPipeline.from_pretrained("kandinsky-community/kandinsky-2-1-inpaint", torch_dtype=torch.float16)
pipe.to("cuda")
init_image = load_image(
"https://huggingface.co/datasets/hf-internal-testing/diffusers-images/resolve/main" "/kandinsky/cat.png"
)
mask = np.zeros((768, 768), dtype=np.float32)
# Let's mask out an area above the cat's head
mask[:250, 250:-250] = 1
out = pipe(
prompt,
image=init_image,
mask_image=mask,
**prior_output,
height=768,
width=768,
num_inference_steps=150,
)
image = out.images[0]
image.save("cat_with_hat.png")
```
To use the [`KandinskyInpaintCombinedPipeline`] to perform end-to-end image inpainting generation, you can run below code instead
```python
from diffusers import AutoPipelineForInpainting
pipe = AutoPipelineForInpainting.from_pretrained("kandinsky-community/kandinsky-2-1-inpaint", torch_dtype=torch.float16)
pipe.enable_model_cpu_offload()
image = pipe(prompt=prompt, image=original_image, mask_image=mask).images[0]
```
🚨🚨🚨 __Breaking change for Kandinsky Mask Inpainting__ 🚨🚨🚨
We introduced a breaking change for Kandinsky inpainting pipeline in the following pull request: https://github.com/huggingface/diffusers/pull/4207. Previously we accepted a mask format where black pixels represent the masked-out area. This is inconsistent with all other pipelines in diffusers. We have changed the mask format in Knaindsky and now using white pixels instead.
Please upgrade your inpainting code to follow the above. If you are using Kandinsky Inpaint in production. You now need to change the mask to:
```python
# For PIL input
import PIL.ImageOps
mask = PIL.ImageOps.invert(mask)
# For PyTorch and Numpy input
mask = 1 - mask
```
### Interpolate
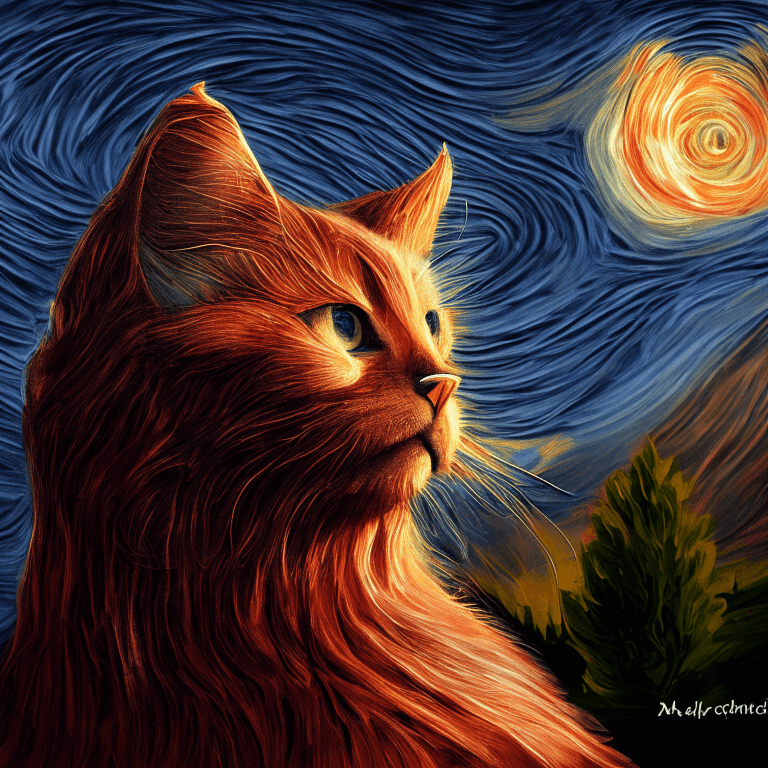
The [`KandinskyPriorPipeline`] also comes with a cool utility function that will allow you to interpolate the latent space of different images and texts super easily. Here is an example of how you can create an Impressionist-style portrait for your pet based on "The Starry Night".
Note that you can interpolate between texts and images - in the below example, we passed a text prompt "a cat" and two images to the `interplate` function, along with a `weights` variable containing the corresponding weights for each condition we interplate.
```python
from diffusers import KandinskyPriorPipeline, KandinskyPipeline
from diffusers.utils import load_image
import PIL
import torch
pipe_prior = KandinskyPriorPipeline.from_pretrained(
"kandinsky-community/kandinsky-2-1-prior", torch_dtype=torch.float16
)
pipe_prior.to("cuda")
img1 = load_image(
"https://huggingface.co/datasets/hf-internal-testing/diffusers-images/resolve/main" "/kandinsky/cat.png"
)
img2 = load_image(
"https://huggingface.co/datasets/hf-internal-testing/diffusers-images/resolve/main" "/kandinsky/starry_night.jpeg"
)
# add all the conditions we want to interpolate, can be either text or image
images_texts = ["a cat", img1, img2]
# specify the weights for each condition in images_texts
weights = [0.3, 0.3, 0.4]
# We can leave the prompt empty
prompt = ""
prior_out = pipe_prior.interpolate(images_texts, weights)
pipe = KandinskyPipeline.from_pretrained("kandinsky-community/kandinsky-2-1", torch_dtype=torch.float16)
pipe.to("cuda")
image = pipe(prompt, **prior_out, height=768, width=768).images[0]
image.save("starry_cat.png")
```
## Optimization
Running Kandinsky in inference requires running both a first prior pipeline: [`KandinskyPriorPipeline`]
and a second image decoding pipeline which is one of [`KandinskyPipeline`], [`KandinskyImg2ImgPipeline`], or [`KandinskyInpaintPipeline`].
The bulk of the computation time will always be the second image decoding pipeline, so when looking
into optimizing the model, one should look into the second image decoding pipeline.
When running with PyTorch < 2.0, we strongly recommend making use of [`xformers`](https://github.com/facebookresearch/xformers)
to speed-up the optimization. This can be done by simply running:
```py
from diffusers import DiffusionPipeline
import torch
t2i_pipe = DiffusionPipeline.from_pretrained("kandinsky-community/kandinsky-2-1", torch_dtype=torch.float16)
t2i_pipe.enable_xformers_memory_efficient_attention()
```
When running on PyTorch >= 2.0, PyTorch's SDPA attention will automatically be used. For more information on
PyTorch's SDPA, feel free to have a look at [this blog post](https://pytorch.org/blog/accelerated-diffusers-pt-20/).
To have explicit control , you can also manually set the pipeline to use PyTorch's 2.0 efficient attention:
```py
from diffusers.models.attention_processor import AttnAddedKVProcessor2_0
t2i_pipe.unet.set_attn_processor(AttnAddedKVProcessor2_0())
```
The slowest and most memory intense attention processor is the default `AttnAddedKVProcessor` processor.
We do **not** recommend using it except for testing purposes or cases where very high determistic behaviour is desired.
You can set it with:
```py
from diffusers.models.attention_processor import AttnAddedKVProcessor
t2i_pipe.unet.set_attn_processor(AttnAddedKVProcessor())
```
With PyTorch >= 2.0, you can also use Kandinsky with `torch.compile` which depending
on your hardware can signficantly speed-up your inference time once the model is compiled.
To use Kandinsksy with `torch.compile`, you can do:
```py
t2i_pipe.unet.to(memory_format=torch.channels_last)
t2i_pipe.unet = torch.compile(t2i_pipe.unet, mode="reduce-overhead", fullgraph=True)
```
After compilation you should see a very fast inference time. For more information,
feel free to have a look at [Our PyTorch 2.0 benchmark](https://huggingface.co/docs/diffusers/main/en/optimization/torch2.0).
To generate images directly from a single pipeline, you can use [`KandinskyCombinedPipeline`], [`KandinskyImg2ImgCombinedPipeline`], [`KandinskyInpaintCombinedPipeline`].
These combined pipelines wrap the [`KandinskyPriorPipeline`] and [`KandinskyPipeline`], [`KandinskyImg2ImgPipeline`], [`KandinskyInpaintPipeline`] respectively into a single
pipeline for a simpler user experience
## Available Pipelines:
| Pipeline | Tasks |
|---|---|
| [pipeline_kandinsky.py](https://github.com/huggingface/diffusers/blob/main/src/diffusers/pipelines/kandinsky/pipeline_kandinsky.py) | *Text-to-Image Generation* |
| [pipeline_kandinsky_combined.py](https://github.com/huggingface/diffusers/blob/main/src/diffusers/pipelines/kandinsky2_2/pipeline_kandinsky_combined.py) | *End-to-end Text-to-Image, image-to-image, Inpainting Generation* |
| [pipeline_kandinsky_inpaint.py](https://github.com/huggingface/diffusers/blob/main/src/diffusers/pipelines/kandinsky/pipeline_kandinsky_inpaint.py) | *Image-Guided Image Generation* |
| [pipeline_kandinsky_img2img.py](https://github.com/huggingface/diffusers/blob/main/src/diffusers/pipelines/kandinsky/pipeline_kandinsky_img2img.py) | *Image-Guided Image Generation* |
### KandinskyPriorPipeline
[[autodoc]] KandinskyPriorPipeline
- all
- __call__
- interpolate
### KandinskyPipeline
[[autodoc]] KandinskyPipeline
- all
- __call__
### KandinskyImg2ImgPipeline
[[autodoc]] KandinskyImg2ImgPipeline
- all
- __call__
### KandinskyInpaintPipeline
[[autodoc]] KandinskyInpaintPipeline
- all
- __call__
### KandinskyCombinedPipeline
[[autodoc]] KandinskyCombinedPipeline
- all
- __call__
### KandinskyImg2ImgCombinedPipeline
[[autodoc]] KandinskyImg2ImgCombinedPipeline
- all
- __call__
### KandinskyInpaintCombinedPipeline
[[autodoc]] KandinskyInpaintCombinedPipeline
- all
- __call__